Setting up Microsoft Entra ID for use with Secure Edge
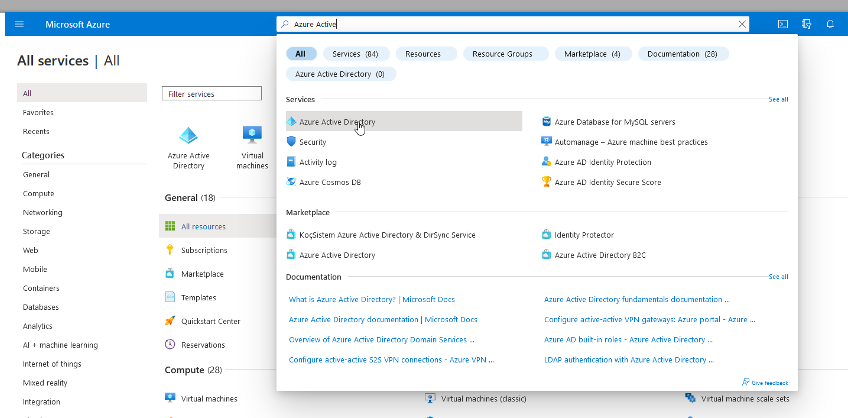
This article discusses how to set up Entra ID (formerly Azure Active Directory) for use with Datto Secure Edge.
Environment
- Datto Secure Edge
Description
This process requires you to switch repeatedly between Entra ID and the Datto Network Manager UI. We recommend keeping both pages open in separate browser windows.
Register the Secure Edge app in Entra ID
-
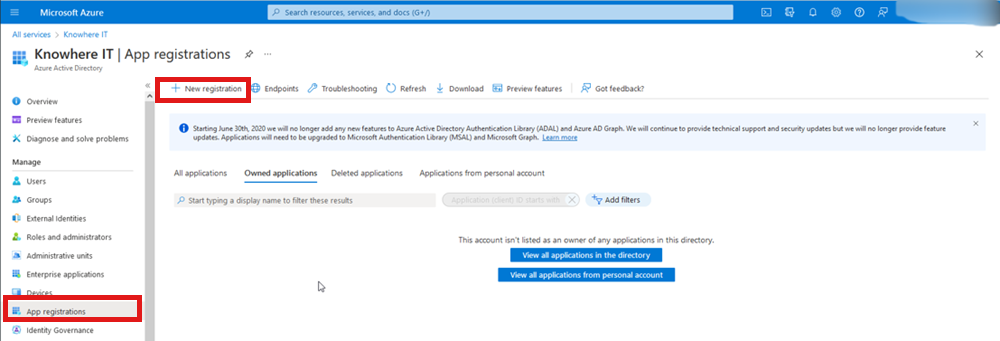
Select App Registration from the left-hand menu, then click New Registration at the top of the screen.
-
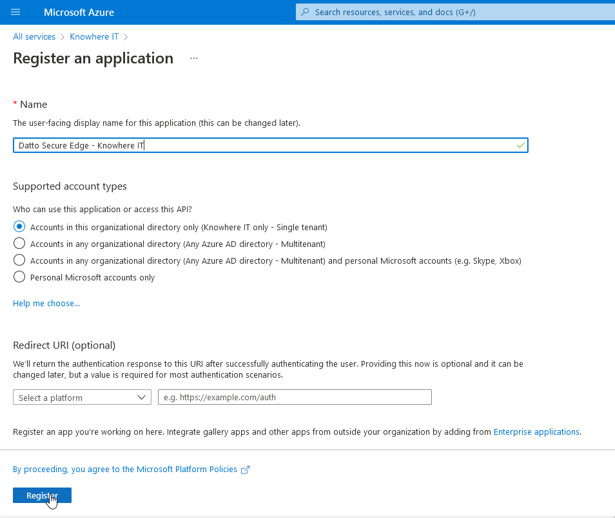
On the Register an Application page, fill in the application name and select an account type. When finished, click Register.
Enter subscriber settings in Network Manager
-
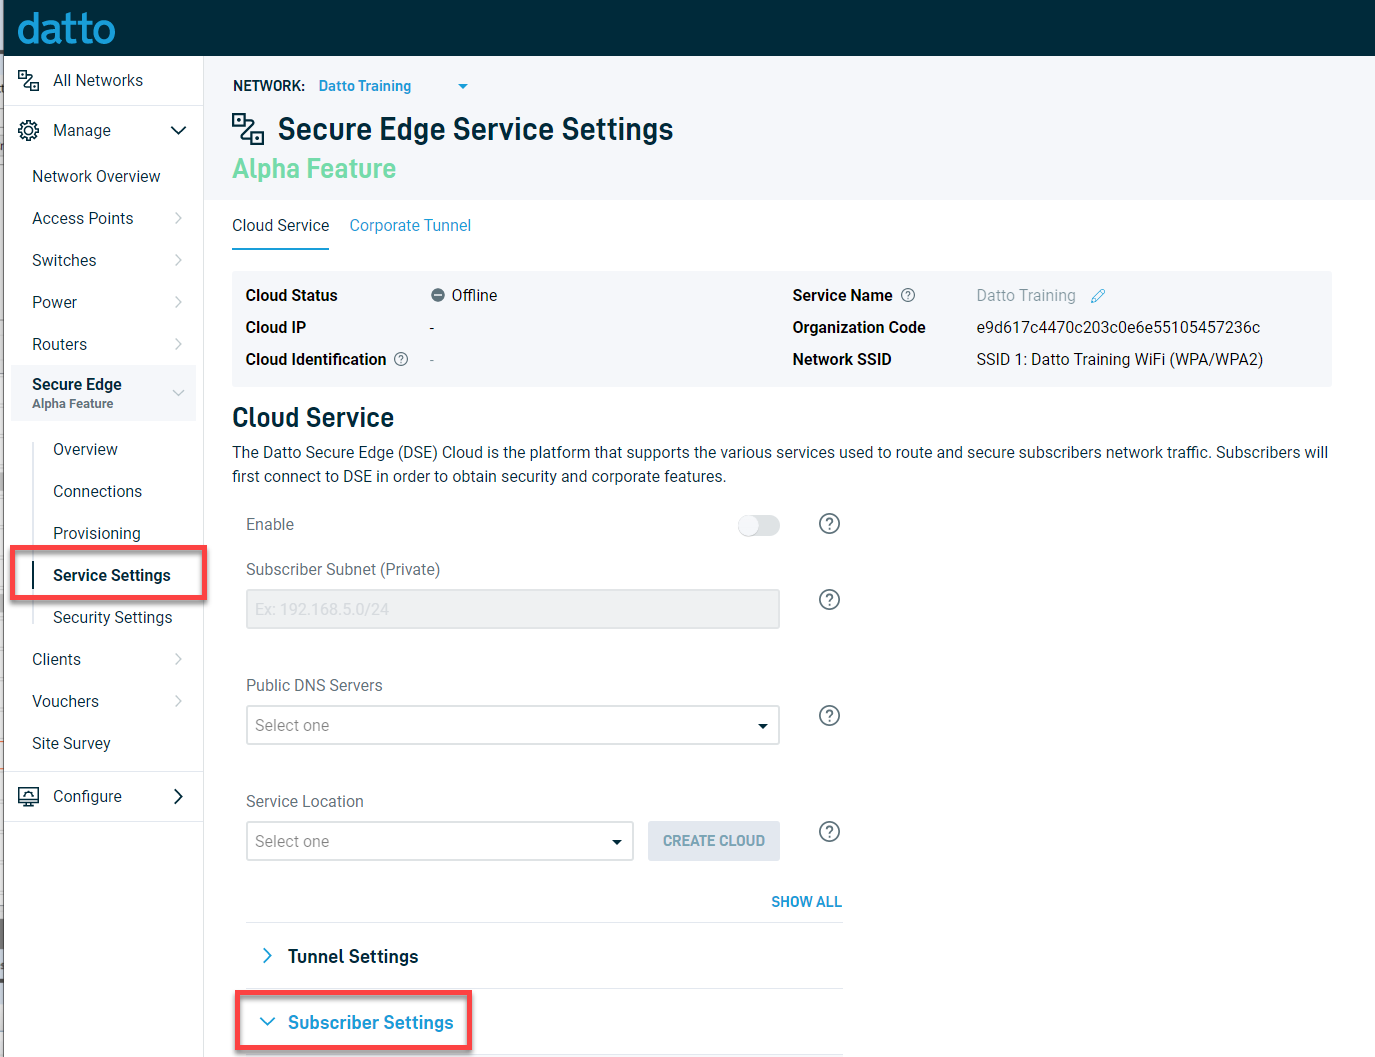
In Network Manager, click Secure Edge in the Navigation menu, then select Service Settings from the expanded options. On the Service Settings page, expand Subscriber Settings.
-
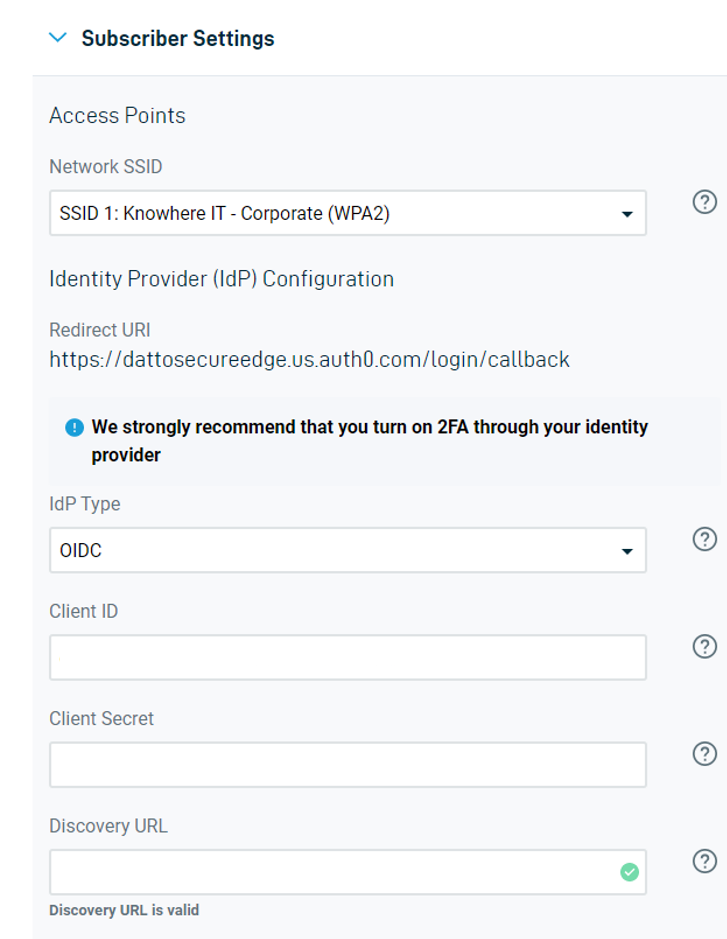
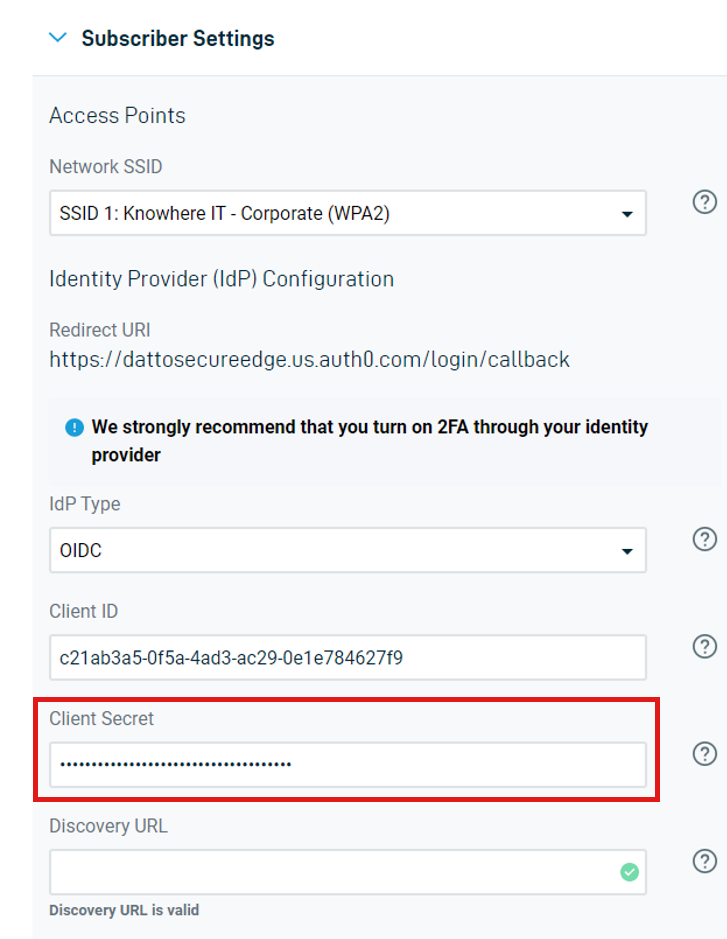
In the IdP Type drop-down menu, select OIDC. The options will change into a series of fields for Client ID, Client Secret, and Discovery URL.
-
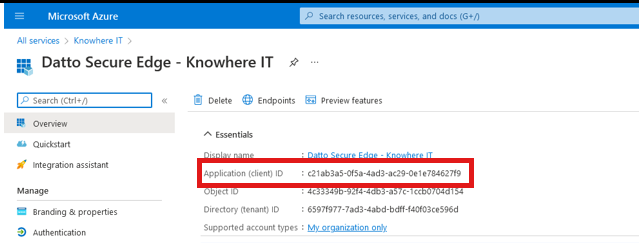
In the ClientID field, Enter the Application Client ID from the app information page in Entra ID.
-
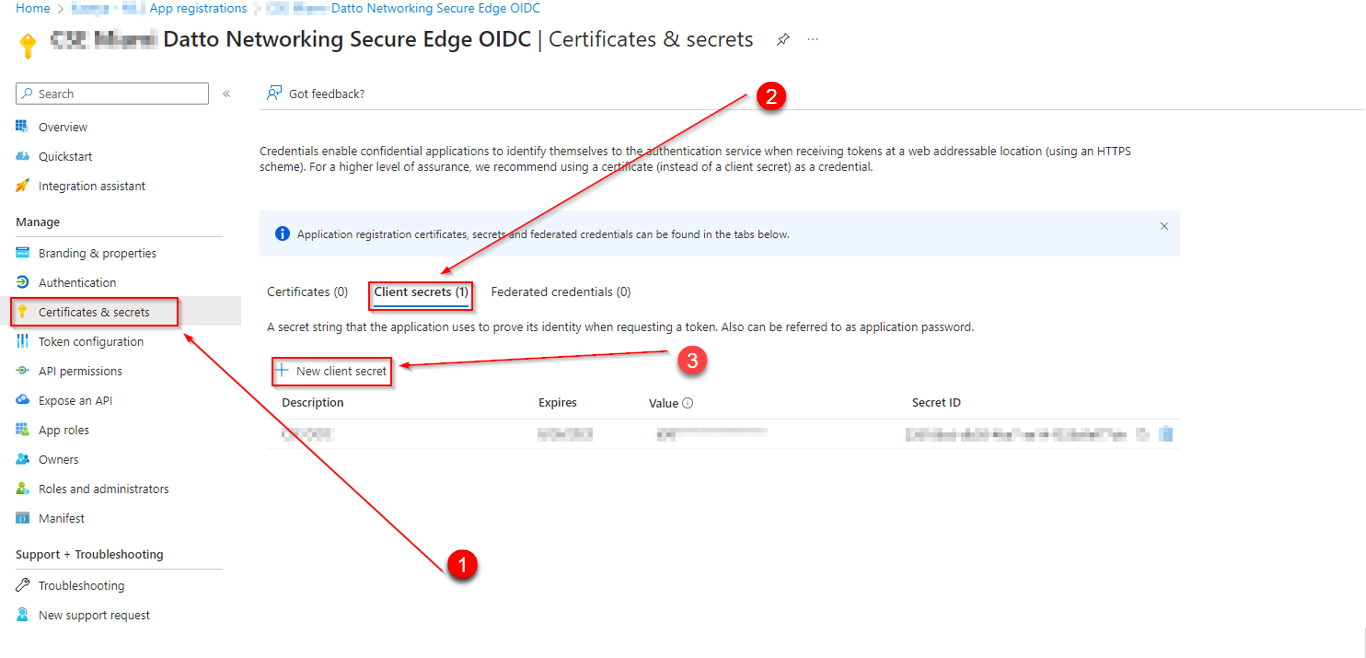
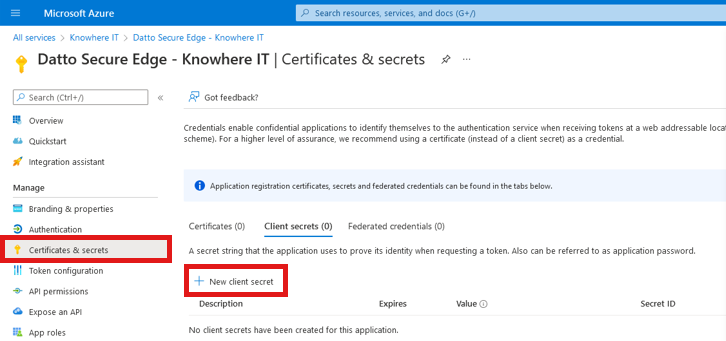
To obtain the Client Secret, return to Entra ID and navigate to Certificates & Secrets in the left-hand menu, then click New Client Secret.
-
Copy the generated client secret Value, return to Datto Network Manager, and paste the value into the Client Secret field.
-
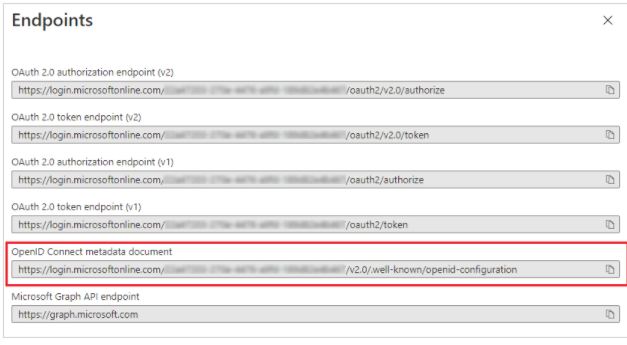
To find the Discovery URL, return to Entra ID and click Overview in the left-hand menu, then click Endpoints at the top of the screen. The Endpoints window will open. Copy the entry for OpenID Connect Metadata document.
-
Return to Datto Network Manager and paste the entry into the Discovery URL field.

-
The system will attempt to validate the Discovery URL. A green checkmark icon will appear.
Connect the redirect URI
-
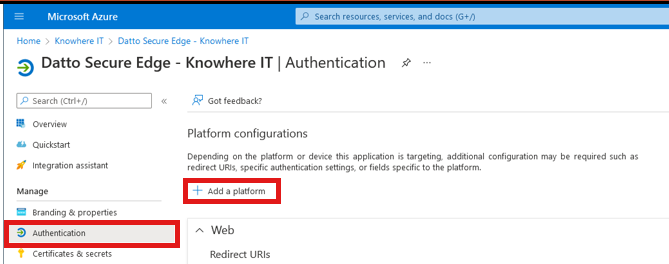
On the Entra ID overview page, click Authentication in the left-hand navigation menu, then click Add a Platform under the Platform configurations heading.
-
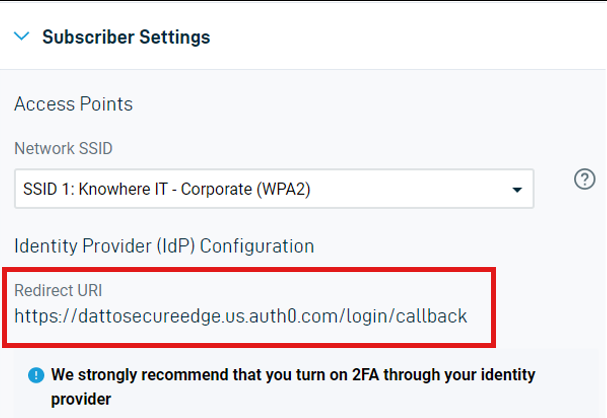
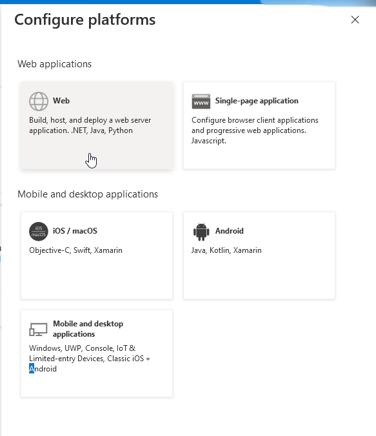
The Configure Platforms pane will open. Select Web, then paste the Redirect URI into the blank space at the bottom of the Web tile. Be sure the paste operation does not include a leading space character, as this will cause an error.
The Authentication page will then show the Redirect URI under the Web heading in the main body of the page.
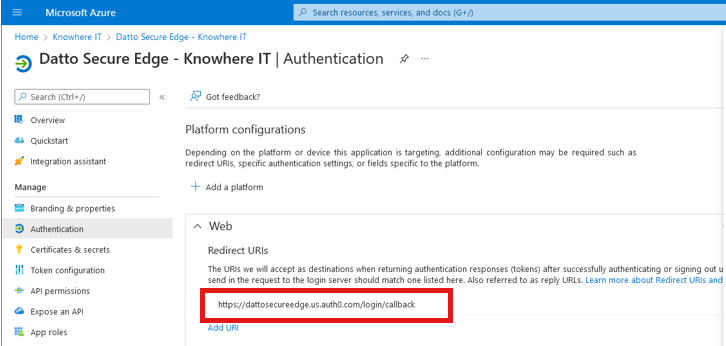
At this point, Secure Edge and Entra ID should be properly connected.
Configure the custom certificate timeline
NOTE To ensure that your certificate lifetime aligns with your environment's security practices, you'll need to set the client secret expiration to a custom value.
-
In the left navigation pane of the Entra ID Overview page, click Certificates & secrets.
-
Click the Client secrets tab.
-
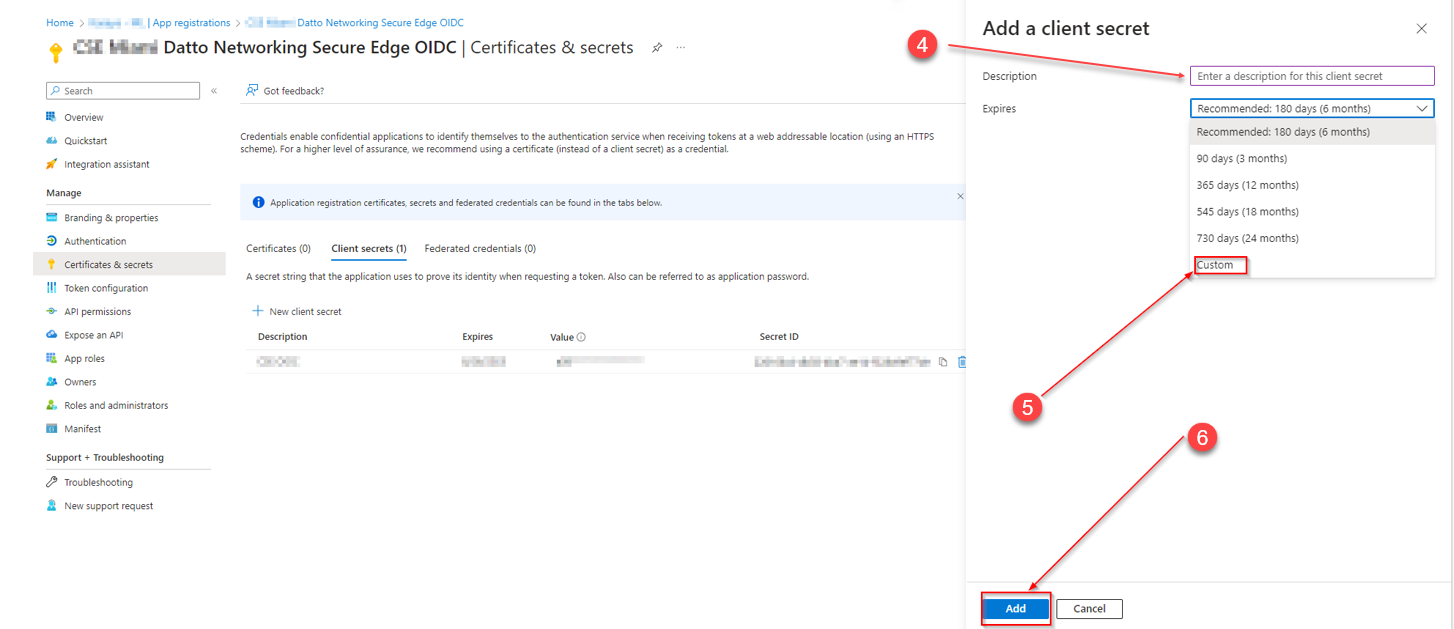
In the Add a client secret window that opens, enter a description for the client secret in the Description field.
-
Click the arrow next to the Expires drop-down and select Custom. Define the interval at which you'd like to rotate keys for security purposes.
Additional Resources
To assign or remove a user or group from the application once it has been created in Entra ID, follow the steps outlined by Microsoft below.
-
Manage users and groups assignment to an application (external link)
